Master Spatchcocking: The Ultimate Guide for Perfect Roast Chicken
For generations, the quest for the perfect roast chicken has presented a culinary challenge: how to achieve uniformly cooked, succulent meat with tantalizingly crispy skin, all without overcooking the delicate breast or leaving the thighs underdone. Traditional roasting methods often lead to this age-old dilemma. But what if there was a simple, transformative technique that not only solves these problems but also slashes your cooking time? Enter spatchcocking.
Mastering the art of spatchcocking, or butterflying, a chicken is a game-changer for home cooks and seasoned chefs alike. This clever preparation method ensures an incredibly juicy bird with beautifully browned, extra-crispy skin every single time. It's a technique that elevates a humble chicken into a show-stopping centerpiece, perfect for a relaxed weeknight dinner or an impressive special gathering. If you're ready to unlock the secret to faster, more flavorful roast chicken, read on.
What is Spatchcocking and Why is it a Game-Changer?
At its heart, spatchcocking is a straightforward technique that involves removing the backbone of a whole chicken and then flattening it out. This seemingly simple alteration has a profound impact on how the chicken cooks. By transforming the bird from a bulky, uneven shape into a flat, uniform canvas, you achieve a level of cooking precision that's otherwise impossible.
Here's why spatchcocking a chicken is an absolute game-changer in the kitchen:
*
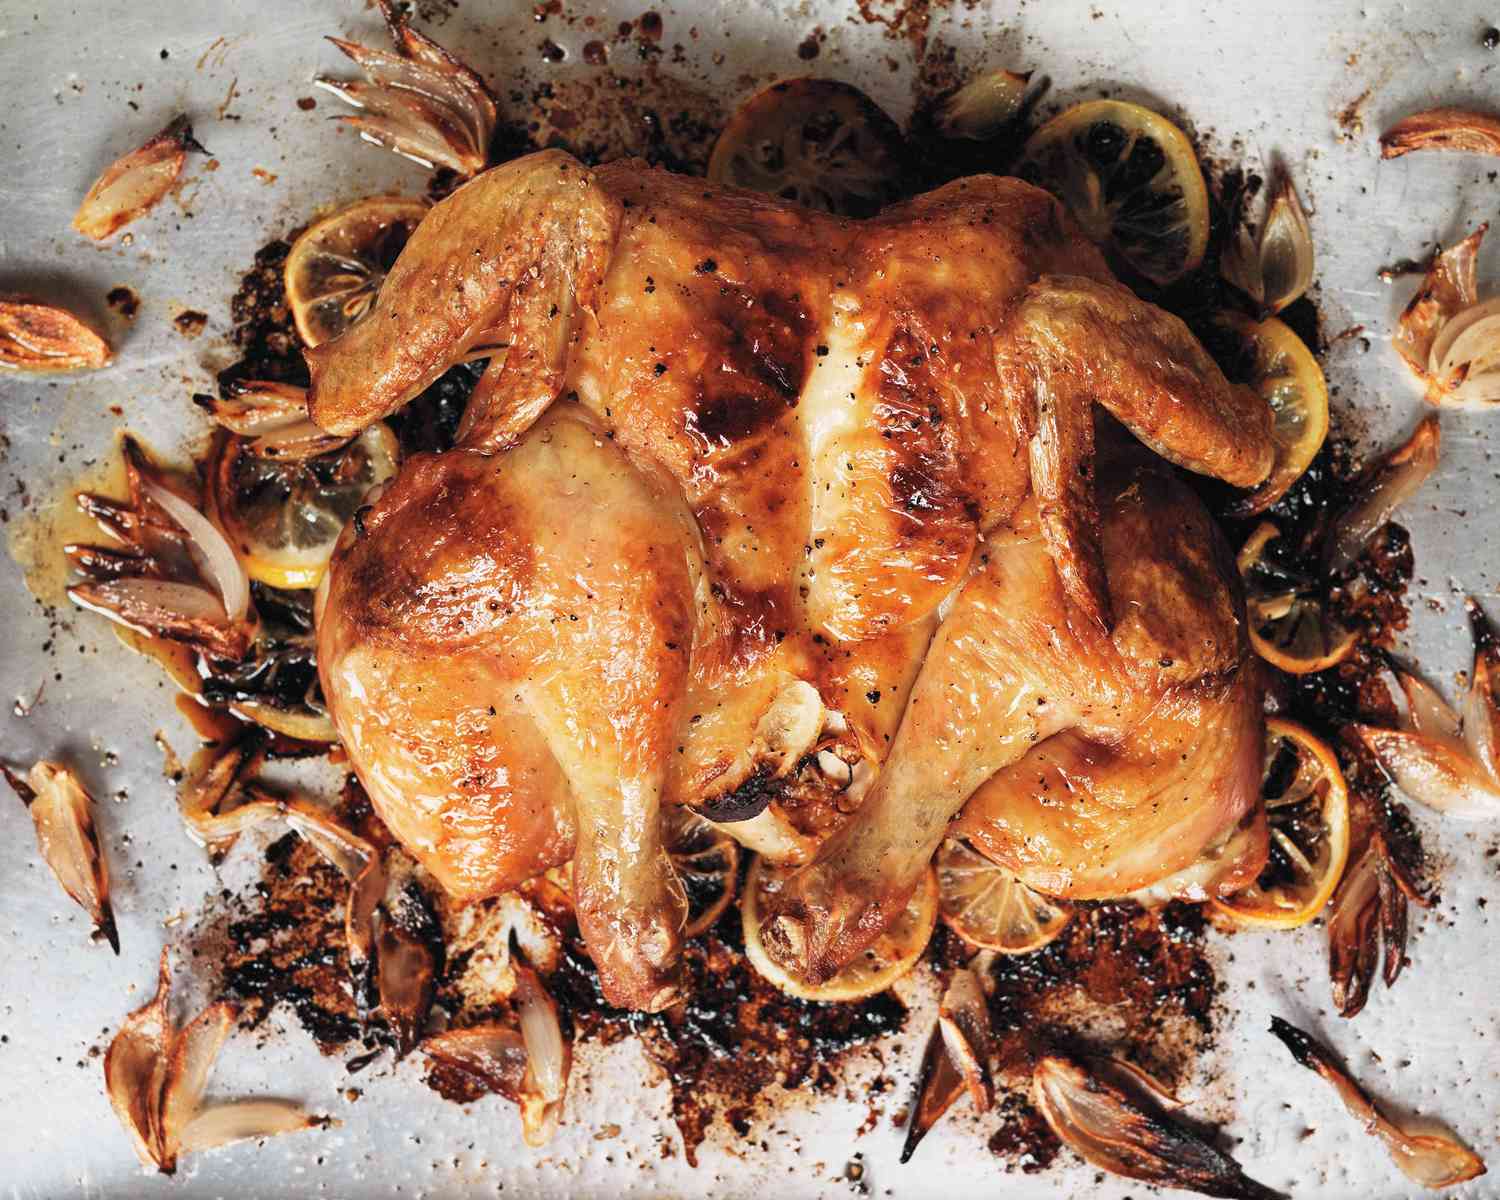
Even Cooking, Every Time: This is arguably the biggest benefit. In a traditional whole chicken, the breast meat, being leaner, cooks faster than the denser, fattier leg and thigh meat. Spatchcocking flattens the chicken, allowing all parts to cook at roughly the same rate. This eliminates the dreaded scenario of dry breast meat and undercooked dark meat, ensuring every bite is perfectly tender and moist.
*
Unrivaled Crispy Skin: Flattening the chicken exposes significantly more skin surface area to the direct heat of the oven. This increased exposure allows the skin to render its fat more efficiently and crisp up uniformly, resulting in a gloriously golden, crackly texture that's incredibly satisfying. If you've been chasing that elusive crispy skin,
Crispy Skin, Juicy Meat: Unlock Faster Roast Chicken with Spatchcocking is just one of the many benefits this method delivers.
*
Significantly Faster Roasting Time: A flatter, thinner chicken cooks much more quickly than a round, intact bird. By allowing heat to circulate more evenly and penetrate all parts simultaneously, spatchcocking can reduce your total roasting time by 15 minutes or more, making a delicious roast chicken a viable option even on busy weeknights.
*
Enhanced Flavor Absorption: With the bird laid open, you have greater access to season both the skin and the exposed meat, allowing marinades, rubs, and herbs to penetrate deeper and infuse the entire chicken with robust flavor.
This method transforms a classic roast chicken into something truly extraordinary—juicy, flavorful, and fast, as Ina Garten famously demonstrates with her own version of the
Ina Garten's Spatchcock Chicken: Juicy, Flavorful, and Fast.
Essential Tools for Mastering the Spatchcock Chicken
While the spatchcocking technique itself is simple, having the right tools makes the process incredibly easy and safe. Don't underestimate the importance of sharp, reliable equipment.
Here's what you'll need:
*
Sharp Kitchen Shears: This is your most crucial tool. Invest in a sturdy pair of sharp kitchen shears designed for poultry. Dull shears will make cutting through the backbone frustrating and potentially dangerous. A good pair will glide through bone with minimal effort.
*
A Large, Stable Cutting Board: You'll need ample space to work with the chicken. A non-slip cutting board will keep the bird secure as you apply pressure.
*
Paper Towels: Essential for thoroughly drying the chicken before seasoning and roasting, which is key to achieving that desired crispy skin.
*
Large Rimmed Baking Sheet or Roasting Pan: Ensure your pan is large enough to accommodate the flattened chicken without overcrowding it. Overcrowding can lead to steaming instead of roasting, preventing the skin from crisping up.
*
Meat Thermometer: While not directly used for spatchcocking, a reliable meat thermometer is indispensable for confirming the chicken is cooked to a safe internal temperature (165°F or 74°C) and ensuring it's perfectly done without being overcooked.
*
Gloves (Optional): If you prefer not to handle raw chicken directly, disposable kitchen gloves can be very helpful.
Step-by-Step Guide to Spatchcocking a Chicken
Don't let the name intimidate you; spatchcocking is surprisingly straightforward. Follow these steps, and you'll be on your way to a perfectly roasted spatchcock chicken in no time.
1. Prepare Your Bird
Start with a whole chicken, ideally between 3 to 4 pounds. Place the chicken
breast-side down on your large, stable cutting board. Position it so the backbone is facing directly up, running along the length of the board. Before you begin cutting, take a moment to pat the entire chicken thoroughly dry with paper towels. This crucial step removes surface moisture, which is vital for achieving that coveted crispy skin during roasting.
2. Locate and Remove the Backbone (First Side)
Identify the backbone, which runs down the center of the chicken's back. Starting from the thigh end of the chicken, use your sharp kitchen shears to cut firmly along one side of the backbone, severing the ribs as you go. You'll be cutting through bone and cartilage, so a steady hand and sharp shears are important. Don't be afraid to apply firm pressure.
3. Remove the Backbone (Second Side)
Once you've cut along one side, turn the chicken around or reposition it to easily access the other side of the backbone. Repeat the cutting process, severing the backbone completely from the bird. Once removed, you can either discard the backbone or, even better, save it in a freezer bag for making flavorful chicken stock later. It adds incredible depth to soups and sauces!
4. Flatten the Chicken
Now, flip the chicken over so it's breast-side up on the cutting board. Open the chicken like a book. You'll notice the breastbone still creating a slight dome. To flatten the chicken completely, place the palms of both hands firmly on the breastbone and press down with significant force until you hear a satisfying crack. This breaks the breastbone and allows the chicken to lie perfectly flat. If it doesn't flatten completely, shift your weight and press down again. This step is essential for even cooking and maximum skin crispiness.
Finally, for a neater presentation and to prevent the delicate wing tips from burning, tuck the wing tips underneath the breast. Your spatchcocked chicken is now ready for seasoning and roasting!
Beyond the Basics: Seasoning Your Spatchcock Chicken
With your chicken perfectly prepped, it's time for flavor! One of the beautiful aspects of a spatchcock chicken is its versatility. You can go simple or elaborate with your seasoning:
*
Classic & Simple: A generous rub of kosher salt, freshly ground black pepper, and perhaps some dried herbs like thyme or rosemary allows the natural, rich flavor of the chicken to shine.
*
Customization is Key: Don't hesitate to experiment! Rubbing the chicken with minced garlic, paprika, onion powder, lemon zest, or a blend of your favorite spices can create endless variations. Consider a marinade or a wet rub for extra moisture and flavor.
*
The Salt Advantage: For the most flavorful and juicy results, season your spatchcock chicken ahead of time. Applying salt at least 30 minutes before roasting, or even better, several hours or overnight in the refrigerator, allows the salt to penetrate the meat, drawing out moisture and then reabsorbing it, leading to a more tender and seasoned bird.
Common Spatchcocking Mistakes to Avoid
While spatchcocking is simple, a few common errors can prevent you from achieving that perfect roast chicken. Being aware of these pitfalls will help you master the technique faster.
*
Using Dull Tools: As mentioned, dull kitchen shears are your enemy. They make the process difficult, messy, and increase the risk of slippage and injury. Always use sharp, heavy-duty shears designed for poultry.
*
Not Drying the Chicken Thoroughly: Moisture on the skin prevents crisping. Pat the chicken *liberally* dry with paper towels—even inside the cavity—before applying any seasoning. This is a non-negotiable step for golden, crunchy skin.
*
Not Flattening the Chicken Properly: Don't be shy! You need to apply significant force to crack and flatten the breastbone. If the chicken isn't completely flat, it won't cook as evenly, negating one of the primary benefits of spatchcocking.
*
Overcrowding the Roasting Pan: Give your chicken room to breathe. If the pan is too small, the chicken will steam in its own juices rather than roast, resulting in soggy skin. Use a large, rimmed baking sheet or roasting pan, ensuring there's plenty of space around the bird for hot air to circulate. If cooking multiple chickens, use separate pans.
*
Guessing Doneness: Relying solely on visual cues can lead to overcooked or, worse, undercooked chicken. Always use a reliable meat thermometer. Insert it into the thickest part of the thigh, avoiding the bone, until it registers 165°F (74°C). This ensures your chicken is safe to eat and perfectly juicy.
Embrace the Spatchcock Revolution
The journey to culinary excellence often involves discovering techniques that simplify complex challenges, and spatchcocking a chicken is undoubtedly one such revelation. By simply removing the backbone and flattening the bird, you unlock a world of benefits: consistently juicy meat, irresistibly crispy skin, and a significantly reduced cooking time. It’s a method that promises to transform your weekly roast chicken from a hit-or-miss affair into a consistently perfect culinary triumph. So, grab those shears, follow these steps, and prepare to impress yourself and your diners with the ultimate perfect roast chicken. Happy roasting!